How To Identify And Fix Frequency Response Issues In Your Studio Monitors?
Response – Ensuring accurate frequency response in your studio monitors is crucial for producing high-quality audio mixes. In this guide, you will learn how to identify and address frequency response issues that may be affecting the sound quality in your studio. By following these steps, you can optimize your studio monitors for a more balanced and accurate listening experience.
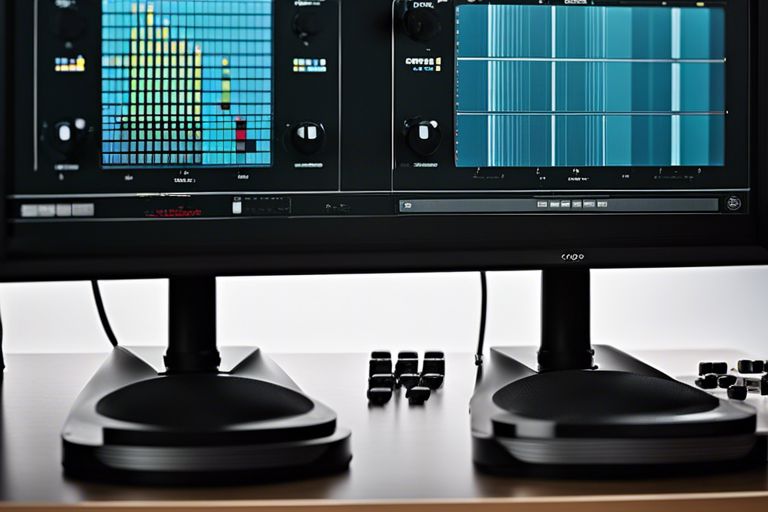
Table of Contents
- Understanding Frequency Response Issues
- What is Frequency Response?
- Why is Accurate Frequency Response Important in Studio Monitors?
- Identifying Frequency Response Issues
- Tips for Detecting Frequency Imbalances
- Common Signs of Frequency Response Problems
- Using Measurement Tools to Identify Issues
- Factors Affecting Frequency Response
- Room Acoustics and Frequency Response
- Monitor Placement and Frequency Response
- Cables and Connectors: How They Impact Frequency Response
- Driver Quality and Frequency Response
- How to Fix Frequency Response Issues
- Adjusting Monitor Placement for Better Frequency Response
- Using Acoustic Treatment to Improve Room Response
- Calibrating Your Monitors for Accurate Frequency Response
- Upgrading Cables and Connectors for Improved Signal Integrity
- Advanced Troubleshooting Techniques
- Prevention is the Best Medicine
- Tips for Preventing Frequency Response Issues in the First Place
- Regular Maintenance and Calibration for Optimal Performance
- Investing in High-Quality Studio Monitors
- Final Words
Understanding Frequency Response Issues
What is Frequency Response?
The frequency response of a speaker or monitor describes how accurately it reproduces audio across the audible frequency range. It indicates how well the speaker can handle different frequencies, from the low rumble of a bass guitar to the high twinkle of a cymbal. A flat frequency response is desirable, meaning the speaker reproduces all frequencies at the same level.
Why is Accurate Frequency Response Important in Studio Monitors?
Accurate frequency response is crucial in studio monitors because it ensures that you hear your audio as it truly sounds, without any artificially boosted or attenuated frequencies. If your monitors have an inaccurate frequency response, you may end up making incorrect decisions during mixing and mastering, leading to unbalanced or muddy sound in your final product.
Furthermore, having an accurate frequency response in your studio monitors allows you to hear all the nuances in your audio, from subtle changes in equalization to precise panning decisions. It enables you to create a well-balanced mix that translates well to other playback systems and ensures that your music sounds the way you intended it to across different platforms.
Identifying Frequency Response Issues
One of the most important aspects of achieving accurate and balanced sound in your studio is being able to identify and address frequency response issues in your studio monitors. By understanding how to detect these issues, you can ensure that your mixes translate well to other playback systems.
Tips for Detecting Frequency Imbalances
- Listen Closely: On Your ears are your most valuable tool when it comes to detecting frequency response issues. Pay attention to any areas where the sound seems to be lacking or exaggerated.
- Use Reference Tracks: Comparing your mixes to professional tracks can help you identify any frequency imbalances in your studio monitors.
- Test Different Listening Positions: The acoustic properties of your room can significantly impact the frequency response of your monitors. Try listening from different spots in the room to identify any problematic frequencies.
The more you familiarize yourself with the sound of your studio monitors, the better you will become at detecting and addressing frequency response issues. The sooner you can identify these issues, the quicker you can take steps to fix them.
Common Signs of Frequency Response Problems
One common sign of frequency response issues in your studio monitors is boominess in the low frequencies, where certain bass frequencies are exaggerated. Another sign is harshness in the high frequencies, which can lead to ear fatigue during long mixing sessions. Additionally, muddy or boxy midrange frequencies can muddy up your mixes and make it difficult to hear individual elements clearly.
Detecting these signs early on can help you prevent further issues down the line. By being aware of the common signs of frequency response problems, you can take proactive steps to address them before they negatively impact your mixes.
Using Measurement Tools to Identify Issues
Tips on a more technical level include using measurement tools such as room correction software or frequency analyzers to identify specific frequency response issues in your studio monitors. These tools can provide you with objective data on how your monitors are performing across the frequency spectrum.
Issues like room modes, speaker placement, or acoustic treatment can all contribute to frequency response problems in your studio. By using measurement tools to identify these issues, you can make informed decisions on how to address them and improve the overall sound quality of your studio.
Factors Affecting Frequency Response
Despite your studio monitors being designed to deliver accurate sound reproduction, several factors can affect their frequency response. Understanding these factors can help you identify and address any issues you may encounter.
Room Acoustics and Frequency Response
Affecting your frequency response, room acoustics play a significant role in how sound waves interact with the space. Factors such as room size, shape, and the materials used in the construction can cause reflections, standing waves, and other acoustic issues that impact the way your monitors reproduce sound. By addressing these room acoustics problems with proper acoustic treatment, you can achieve a more accurate and balanced frequency response.
Monitor Placement and Frequency Response
The placement of your studio monitors can also have a major impact on their frequency response. Placing your monitors too close to a wall or in a corner can result in bass buildup, leading to an uneven frequency response. To optimize your listening experience, position your monitors at ear level and away from reflective surfaces to minimize unwanted interactions that can affect your frequency response.
Placement plays a crucial role in ensuring that your studio monitors deliver accurate and reliable frequency response. By experimenting with different placement options and utilizing tools like room correction software, you can fine-tune your monitor setup to achieve an optimal listening environment.
Cables and Connectors: How They Impact Frequency Response
Some aspects of your studio setup, such as cables and connectors, can also impact your monitors’ frequency response. Using poor-quality cables or connectors can introduce interference and signal loss, affecting the overall sound quality. It is important to invest in high-quality cables and connectors to maintain a clean and consistent frequency response in your studio.
Driver Quality and Frequency Response
Factors like driver quality can significantly influence your studio monitors’ frequency response. High-quality drivers are vital for accurate sound reproduction across the frequency spectrum. Investing in monitors with premium drivers can ensure your mixes are translated reliably and accurately, giving you confidence in your sound.
How to Fix Frequency Response Issues
Once again, identifying frequency response issues in your studio monitors is just the first step. The real challenge lies in fixing these issues to ensure that you are getting the most accurate sound reproduction possible. Here are some steps you can take to address frequency response problems in your studio:
Adjusting Monitor Placement for Better Frequency Response
Monitor placement plays a crucial role in determining the frequency response you hear in your studio. Placing your monitors too close to walls or corners can result in bass build-up, while placing them too far apart can lead to a lack of stereo image. Experiment with different positions and angles to find the optimal placement that gives you a balanced frequency response across the spectrum.
Using Acoustic Treatment to Improve Room Response
Acoustic treatment such as bass traps, acoustic panels, and diffusers can help address issues like reflections, standing waves, and overall room acoustics that can affect frequency response. By strategically placing acoustic treatment in your studio, you can improve the overall sound quality and clarity of your monitoring environment.
A
Calibrating Your Monitors for Accurate Frequency Response
Now, after adjusting your monitor placement and incorporating acoustic treatment, it’s important to calibrate your monitors to ensure accurate frequency response. This involves using measurement microphones and software to analyze the frequency response of your monitors and make adjustments as needed to achieve a flat and natural sound reproduction.
Response
Upgrading Cables and Connectors for Improved Signal Integrity
With all the effort you’ve put into optimizing your studio setup for better frequency response, don’t overlook the importance of using high-quality cables and connectors. Poor-quality cables can introduce signal degradation and interference, affecting the overall sound quality and accuracy of your monitoring system. By upgrading to high-quality cables and connectors, you can ensure integrity in signal transmission and maintain a consistent frequency response.
Advanced Troubleshooting Techniques
- Using EQ to Compensate for Frequency Response Issues
Step Action 1 Measure your studio monitors’ frequency response using measurement software. 2 Identify areas where there are peaks or dips in the frequency response. 3 Use an EQ plugin on your audio interface or DAW to adjust the levels of problematic frequencies. 4 Continue to fine-tune until you achieve a more balanced frequency response. - Identifying and Addressing Resonance and Reflection Issues
Step Action 1 Listen for any boomy or muddy bass frequencies in your mixes. 2 Place bass traps in the corners of your room to absorb low-frequency resonances. 3 Consider adding acoustic panels to reduce reflections and improve overall sound quality. - How to Use Measurement Software to Analyze Frequency ResponseMeasurement software such as Room EQ Wizard or FuzzMeasure can provide you with detailed graphs of your studio monitors’ frequency response. This allows you to pinpoint specific problem areas and make informed decisions on how to address them.
Troubleshooting frequency response issues in your studio monitors can be a challenging but rewarding process. By utilizing advanced techniques like using EQ to compensate for frequency response issues and identifying resonance and reflection problems, you can ensure that your mixes translate well across different playback systems.
Prevention is the Best Medicine
Tips for Preventing Frequency Response Issues in the First Place
On your quest for pristine sound quality in your studio, it’s crucial to take proactive measures to prevent frequency response issues. By following these tips below, you can minimize the chances of encountering such problems:
- Position your studio monitors properly to avoid unwanted reflections and standing waves.
- Ensure proper acoustic treatment in your studio to control reverberation and echoes.
- Regularly clean and maintain your studio monitors to prevent dust build-up and potential damage.
Perceiving any abnormalities in your studio monitor’s sound quality early on can help you address and rectify the issue before it becomes more significant.
Regular Maintenance and Calibration for Optimal Performance
Now, to ensure consistent and accurate sound reproduction, it’s crucial to incorporate regular maintenance and calibration into your studio routine. This involves cleaning your monitors, checking for any loose connections, and calibrating them periodically to maintain their performance.
Plus, establishing a routine for monitor calibration can help you identify any potential frequency response issues early on, allowing for timely adjustments and optimal performance of your studio monitors.
Investing in High-Quality Studio Monitors
With a plethora of studio monitor options available in the market, investing in high-quality studio monitors is a crucial step in preventing frequency response issues. High-quality monitors typically offer more accurate frequency response, better build quality, and advanced features that can enhance your overall listening experience.
Tips to ensure you are getting the best studio monitors for your needs include researching different brands and models, reading reviews, and listening tests to determine which monitors best suit your studio setup and preferences.
Final Words
Presently, you have learned about the importance of frequency response in studio monitors and how it can affect the accuracy of your audio monitoring. By understanding common frequency response issues such as peaks, dips, and tilt, you are better equipped to identify these problems in your own studio setup. In addition, you have gained insights into how to tackle these issues through room treatment, speaker placement, and using tools like parametric EQ to make necessary adjustments.
Do not forget, achieving a flat frequency response in your studio monitors is crucial for making accurate mixing decisions and producing high-quality recordings. By following the steps outlined in this guide, you can address frequency response issues in your studio monitors and create a more reliable monitoring environment for your music production endeavors.