Best Studio Monitors 2024
In the realm of audio production, the importance of accurate sound cannot be overstated, and at the heart of achieving this sonic precision lies the indispensable studio monitor. Whether you are an aspiring bedroom producer, a seasoned sound engineer, or a passionate audiophile, selecting the best studio monitors is crucial for crafting tracks that translate well across various playback systems. In this blog post, we delve into the top studio monitors available today, exploring their features, sound quality, and value for money to help you make an informed decision. Join us as we separate the signal from the noise, guiding you towards the perfect monitors to elevate your studio setup and ensure your mixes sound exceptional anywhere they’re heard.
Table of Contents
- Top 5 Studio Monitors:
- 1. Yamaha HS5 – The Best Studio Monitor Overall
- 2. PreSonus Eris 3.5 Studio Monitors – Best Entry-level Studio Monitors
- 3. JBL 305P MkII – Best Studio Monitor for Beginners
- 4. Adam Audio T5V – Best Value Studio Monitor for Money
- 5. M-Audio BX4 – Best Budget Studio Monitor
- Things To Consider When Buying a Studio Monitor
- Understanding Studio Monitor Types
- Active vs Passive Monitors
- Nearfield vs Midfield vs Farfield Monitors
- Wireless vs Wired Monitors
- Key Factors to Consider
- Frequency Response and Accuracy
- Driver Size and Type
- Power Output and Sensitivity
- Connectivity Options and Compatibility
- Step-by-Step Guide to Choosing the Right Monitor
- Assessing Your Studio Space and Needs
- Setting a Budget and Prioritizing Features
- Researching and Comparing Different Models
- Reading Reviews and Consulting with Experts
- Tips for Getting the Most Out of Your Monitor
- Proper Placement and Calibration
- Using Room Correction Software and Tools
- Investing in Acoustic Treatment for Your Studio
- Regular Maintenance and Upkeep
- Weighing the Pros and Cons of Popular Brands
- KRK vs Yamaha vs JBL
- Genelec vs Neumann vs Dynaudio
- Presonus vs Focusrite vs Native Instruments
- Additional Features to Consider
- Built-in EQ and Compression
- Bluetooth and Wireless Connectivity
- Summing up
Top 5 Studio Monitors:
1. Yamaha HS5 – The Best Studio Monitor Overall

The Yamaha HS5 outperforms its size expectations. These 5 inch speakers offer clarity and detail making them a great choice for those looking for an authentic sound experience. What makes the Yamaha HS5 stand out? Its flat sound profile is truly impressive. In a market the HS5 stands out by delivering incredibly precise audio output. The clear midrange and excellent high frequency detail make it ideal for both mixing and casual listening.
Despite its size the HS5 doesn’t compromise on performance. While the bass may not reach depths due to the 5 inch woofer this can actually be advantageous. The bass is tight and impactful avoiding any booming sounds that can plague other setups. Although theres a peak around 1KHz it’s a minor issue compared to its overall capabilities.
If you’re yearning for bass extension you could consider upgrading to the HS8 or adding the HS8S Subwoofer later on. However on their own the HS5 monitors capture every subtle detail in your mixes revealing nuances you might have overlooked before.
These monitors also bring a touch of sophistication to your studio with their design. While they may not be flawless they come impressively close especially given their price point.
To notice an improvement, in quality you’d likely need to double your budget at least. If you’re dedicated, to your art these are a must know.
2. PreSonus Eris 3.5 Studio Monitors – Best Entry-level Studio Monitors

Introducing the PreSonus Eris 3.5 Studio Monitors. These amazing speakers offer quality that goes beyond expectations making them ideal for beginners.
You can customize your experience with the acoustic tuning controls ensuring that your sound is always just right. These monitors feature both unbalanced inputs to accommodate different devices. They come equipped with 3.5 inch frequency drivers and 1 inch silk dome high frequency drivers delivering a consistent 50W of power.
What sets them apart in the entry level market is the range of features available at this price point. You’ll enjoy RF interference protection, a filter and a power saving mode. Setting them up is easy. The sound they produce is rich and clear which is impressive considering their budget friendly price.
Although their frequency response range of 80Hz to 20,000Hz may not be the widest it’s more than sufficient for entry level monitors. For those looking for sound quality the PreSonus Eris 3.5 is hard to beat. Its compact size also makes it perfect for spaces without compromising on audio fidelity.
The overall value of these monitors won me over completely. One downside worth mentioning is that they do not have Bluetooth connectivity, like the expensive Eris 4.5BT model.
On the side it’s a minor compromise when you consider the exceptional quality. To wrap it up the PreSonus Eris 3.5 is a choice, for individuals starting out in audio mixing without breaking the bank.
3. JBL 305P MkII – Best Studio Monitor for Beginners

JBLs 305P MkII studio monitors are a choice. These speakers offer sound, ideal for newcomers who want to mix their music. The wide listening area at this price point is impressive. With an imperfect setup you can still enjoy excellent sound quality without overwhelming bass or harsh highs found in more expensive options. Spending hours in front of these speakers won’t tire your ears.
The adjustable EQ controls on the rear are a game changer. Placing the speakers on your desk? Just adjust the bass. Opting for stands? You’ll achieve a balance with minimal adjustments. This flexibility is beneficial for beginners venturing into mixing.
What sets them apart? The value they provide. Despite being budget friendly they compete well with pricier models in terms of performance. However if you prefer bass you might need an additional subwoofer for genres that focus on heavy bass.
JBL 305P MkII monitors offer value and impressive sound quality for beginners. They are user friendly, customizable and comfortable, for work sessions.
4. Adam Audio T5V – Best Value Studio Monitor for Money

Adam Audio T5V studio monitors are really impressive. If you’re in the market for high quality home studio equipment you’ll be impressed by these speakers. They provide a balanced sound thats clear without being too sharp. The ribbon tweeters help prevent ear fatigue making long sessions comfortable.
When comparing the T5V monitors to expensive Adam models you’ll appreciate the great value they offer. While they may not have flat of a frequency response as their pricier counterparts they still perform exceptionally well as reference monitors. They can handle volumes without distortion ensuring they can handle all kinds of audio content with ease.
One notable feature is their neutrality, which ensures mixing—a crucial aspect of audio work. Their ability to maintain clarity at volumes offers flexibility for both music production and listening enjoyment.
Course no product is perfect. Some users may prefer a flatter frequency response for utmost precision. However considering their price point the T5V monitors deliver more than performance.. Their sleek design makes them a great addition to any home studio setup.
In conclusion these monitors are a choice for anyone looking for reliable studio equipment, on a budget.
5. M-Audio BX4 – Best Budget Studio Monitor
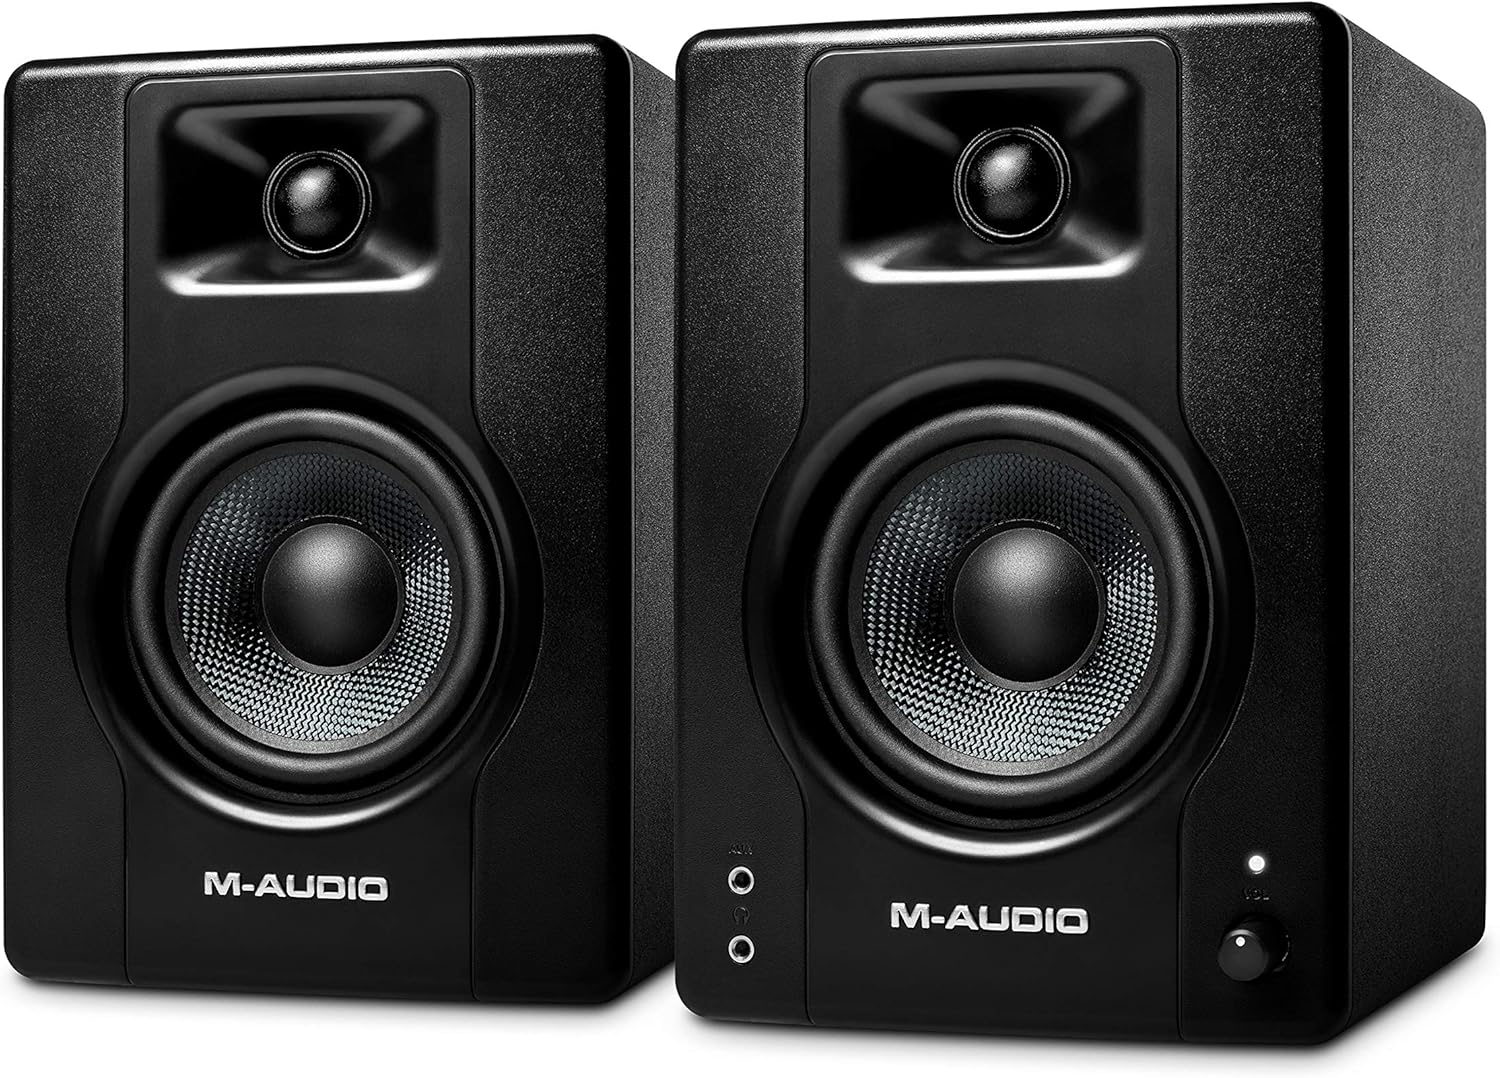
The M-Audio BX4 is compact yet powerful making it a fantastic choice for aspiring music producers. Compared to models the BX4 stands out due to its top notch build quality, affordability and exceptional sound performance.
Featuring 4.5″ Kevlar LF drivers these studio monitors deliver strong bass setting them apart as an excellent budget friendly option for low end frequencies. The speakers produce quality that rivals more expensive alternatives on the market. With a 1″ silk dome tweeter they ensure high end frequencies that usually come with pricier monitors.
Setting up these monitors is simple and straightforward for beginners. Their sleek design adds a touch, to any home studio setup while blending seamlessly with your existing equipment.
The standout feature of the BX4 is its sound quality. Whether you’re mixing music or fine tuning a podcast these monitors offer balanced audio output that elevates every detail.
It’s worth noting one drawback; in very confined spaces the bass may be slightly overpowering. However this can be easily remedied through room adjustments.
In summary the M-Audio BX4 provides value for both beginners and experienced users alike.
It’s a mix of being budget friendly high quality and user friendly. If you explore the details further you may discover that they match perfectly with what your studio requires.
Things To Consider When Buying a Studio Monitor
Size matters when it comes to choosing the right studio monitor for your needs. Before making a purchase, consider the size of your studio space and how much room you have for the monitor. Additionally, think about the power output, frequency response, and input options to ensure you’re getting a studio monitor that suits your specific audio needs. Be mindful of, the right studio monitor can make a world of difference in the quality of your audio production.
Understanding Studio Monitor Types
The type of studio monitor you choose can significantly impact the accuracy of the sound you hear. Here are the key types of studio monitors you should consider when making your purchase:
| Active Monitors | Passive Monitors |
| Nearfield Monitors | Midfield Monitors |
| Farfield Monitors |
Active vs Passive Monitors
One of the main differences between active and passive monitors is how they are powered. Active monitors have built-in amplifiers, which means you don’t need an external amplifier to power them. Passive monitors, on the other hand, require an external amplifier to function properly. Active monitors are generally more popular for home studios due to their convenience and ease of setup. Perceiving the differences between active and passive monitors can help you decide which type is best suited for your studio setup.
Nearfield vs Midfield vs Farfield Monitors
Assuming that you are familiar with the different types of monitors, it’s necessary to understand the differences in their placement and intended listening distance. Nearfield monitors are designed to be placed close to you, usually on the desk, and are ideal for small to medium-sized studios. Midfield monitors are placed further away and are suitable for larger studio spaces. Farfield monitors are designed for even bigger studio environments where the listening position is significantly farther from the speakers. For instance, when choosing between nearfield, midfield, and farfield monitors, consider the size of your studio and the distance you will be from the speakers to ensure you get the most accurate sound reproduction for your space.
Wireless vs Wired Monitors
Active monitors can be either wireless or wired. Wireless monitors offer more flexibility in placement and eliminate the need for excess cables running through your studio. However, they may be susceptible to interference and latency issues. Wired monitors, while less convenient in terms of setup, provide a more stable and reliable connection for critical listening tasks. Concerning choosing between wireless and wired monitors, consider your specific needs and the importance of a stable connection in your studio setup.
Key Factors to Consider
Frequency Response and Accuracy
To ensure the accuracy of sound reproduction in your studio, it is crucial to consider the frequency response of the studio monitor you are purchasing. The frequency response refers to the range of frequencies that a monitor can reproduce accurately. A wide frequency range is ideal as it allows you to hear the full spectrum of sound in your audio recordings. Look for a studio monitor with a flat frequency response, meaning that it does not artificially boost or attenuate certain frequencies.
Driver Size and Type
If you are looking for a studio monitor that can deliver powerful bass and clear high frequencies, you should pay attention to the driver size and type. Larger drivers generally produce deeper bass, while smaller drivers excel at reproducing higher frequencies with more clarity. Additionally, the type of driver (such as cone, dome, or ribbon) can also impact the sound quality of the monitor.
This information is crucial as it will help you select a studio monitor that best suits your audio production needs. Keep in mind that different driver sizes and types are suited for different music genres and mixing styles.
Power Output and Sensitivity
One of the key factors to consider when buying a studio monitor is the power output and sensitivity. The power output indicates how loud the monitor can get without distorting the sound, while sensitivity is a measure of how efficiently the monitor converts power into sound. A monitor with higher power output and sensitivity is ideal for larger studio spaces or for mixing at higher volumes.
It is important to consider the power output and sensitivity of the studio monitor to ensure that it can meet your audio production requirements. A monitor with adjustable settings for power output and sensitivity can offer more flexibility in different listening environments.
Connectivity Options and Compatibility
When choosing a studio monitor, it is important to consider the connectivity options and compatibility with your existing audio equipment. Some studio monitors offer a variety of input options such as XLR, TRS, and RCA, allowing you to connect to different audio interfaces or devices easily. Additionally, wireless connectivity options like Bluetooth can provide more flexibility in your studio setup.
Sensitivity to the connectivity options and compatibility of a studio monitor can ensure seamless integration with your audio setup. Make sure to check the compatibility of the monitor with your audio interface, computer, or other devices to avoid any connectivity issues.
Step-by-Step Guide to Choosing the Right Monitor
Once again, picking the right studio monitor for your setup can be a crucial decision that can impact the quality of your work. Here is a step-by-step guide to help you navigate through the process:
Assessing Your Studio Space and Needs
| Studio Space | Needs |
| Consider the size and acoustics of your room. | Determine if you need nearfield or midfield monitors. |
| Think about potential sound reflections and how to control them. | Identify if you require additional features like built-in DSP or room correction. |
Some studios may benefit from larger monitors with more power, while others may require smaller, more compact options. Assessing your studio space and needs is an imperative first step to narrowing down your options.
Setting a Budget and Prioritizing Features
| Budget | Features |
| Determine how much you are willing to invest in your studio monitors. | Decide which features are non-negotiable for your workflow. |
| Factor in additional costs like cables, speaker stands, and acoustic treatment. | Consider if connectivity options like Bluetooth or wireless are important to you. |
Choosing the right studio monitor involves setting a budget and prioritizing features that align with your production needs. Understanding your financial limits and must-have specifications will guide you in making an informed decision.
Researching and Comparing Different Models
| Research | Comparison |
| There’s a wide range of studio monitor options available from various brands. | Compare specifications, reviews, and pricing of different models. |
| Read product descriptions and user experiences to learn more about each monitor. | Weigh the pros and cons of each model to see which aligns best with your requirements. |
There’s a plethora of studio monitor models on the market, so researching and comparing them is vital to finding the right fit for your studio. By carefully examining different options, you can narrow down your choices based on performance, features, and budget.
Reading Reviews and Consulting with Experts
| Reviews | Experts |
| Plus | Setting |
| Read user reviews and professional evaluations to gather insight on monitor performance. | A |
Reading reviews and seeking advice from industry experts can provide valuable insights into the real-world performance of studio monitors. A meticulous review of feedback and consulting with professionals can offer guidance in making your final selection.
Tips for Getting the Most Out of Your Monitor
-
Proper Placement and Calibration
Proper placement of your studio monitors is crucial to getting the best sound quality. Make sure to position them at ear level and form an equilateral triangle with your listening position. This setup will help ensure accurate sound reproduction and help you make better mixing decisions. Additionally, calibrating your monitor speakers using a reference microphone and measurement software can help fine-tune the sound to your specific room acoustics.
This will ensure that you are hearing a true representation of your audio and can help you mix more effectively. Recall, even the best studio monitors won’t perform at their best if they are not properly placed and calibrated.
-
Using Room Correction Software and Tools
Understanding how your room acoustics can affect the sound coming from your studio monitors is crucial. Utilizing room correction software and tools can help mitigate issues such as standing waves, reflections, and frequency imbalances. By measuring the acoustic characteristics of your room and applying corrections through software or hardware tools, you can achieve a more accurate and balanced sound.
Room correction software can help compensate for deficiencies in your room’s acoustics, allowing you to hear your audio more accurately. This can lead to better mixes and ultimately, more professional-sounding recordings.
-
Investing in Acoustic Treatment for Your Studio
Some rooms may require additional acoustic treatment to address sound reflections, echoes, and standing waves that can negatively impact your listening experience. Investing in acoustic panels, bass traps, and diffusers can help improve the sound quality in your studio by reducing unwanted frequencies and enhancing the clarity of your audio.
Room acoustics play a significant role in how you perceive sound, so taking the time to properly treat your space can make a significant difference in the accuracy of your monitoring environment.
-
Regular Maintenance and Upkeep
Little things like dusting your monitors regularly, checking cables for wear and tear, and keeping your studio clean can all contribute to the longevity and performance of your equipment. Regular maintenance and upkeep of your studio monitors will ensure that they continue to perform at their best and provide you with accurate sound reproduction.
Monitor speakers are precision instruments, so taking care of them will not only extend their lifespan but also help you maintain a consistent and reliable monitoring environment for your audio projects.
Weighing the Pros and Cons of Popular Brands
KRK vs Yamaha vs JBL
An important factor to consider when buying studio monitors is the brand reputation and the specific features they offer. KRK, Yamaha, and JBL are three popular brands in the market, each with its own strengths and weaknesses.
| Brands | Pros and Cons |
| KRK | Known for punchy bass response; Some models may lack overall accuracy. |
| Yamaha | Reliable and consistent performance; Some users find the sound to be too flat. |
| JBL | Powerful and dynamic sound; Some users report issues with build quality. |
Genelec vs Neumann vs Dynaudio
Assuming you are considering high-end studio monitors, Genelec, Neumann, and Dynaudio are top contenders in this category. These brands are known for their exceptional build quality and audio accuracy.
| Brands | Pros and Cons |
| Genelec | Unparalleled sound quality and imaging; Higher price point may not be suitable for all budgets. |
| Neumann | Pristine audio reproduction; Some users find the design to be too clinical. |
| Dynaudio | Natural and detailed sound; Limited product range compared to other brands. |
This table gives you a quick overview of what each brand excels at and where they may have some limitations. Depending on your specific needs and preferences, you can choose the brand that aligns best with your requirements.
Presonus vs Focusrite vs Native Instruments
An crucial aspect to look into when comparing studio monitor brands is the connectivity options and bundled software that they provide. Presonus, Focusrite, and Native Instruments are popular choices among producers and audio engineers.
| Brands | Pros and Cons |
| Presonus | Great value for money; Some users report reliability issues with certain models. |
| Focusrite | High-quality preamps and converters; Limited software offerings compared to other brands. |
| Native Instruments | Integration with NI software ecosystem; Higher learning curve for beginners. |
When choosing between these brands, consider not only the audio performance but also the additional features that come with the monitors. This can enhance your overall studio setup and workflow.
Popular brands have their own unique characteristics and cater to different preferences. By weighing the pros and cons of each brand, you can make an informed decision that aligns with your studio setup and sound preferences.
Additional Features to Consider
Built-in EQ and Compression
There’s no denying the importance of having built-in EQ and compression features in your studio monitors. These features allow you to fine-tune the sound coming out of your monitors and ensure that it is optimized for your specific needs. EQ controls let you adjust the bass, mids, and treble levels to suit your preferences and the acoustics of your space. Compression, on the other hand, helps to even out the dynamics of your audio, ensuring a more balanced and consistent sound output.
Bluetooth and Wireless Connectivity
Compression and wireless connectivity
Features like Bluetooth and wireless connectivity can add a whole new level of convenience to your studio setup. With Bluetooth-enabled studio monitors, you can easily stream music or audio directly from your smartphone, tablet, or computer without the need for any cables. This feature can be particularly handy if you collaborate with other artists or need to quickly play back reference tracks during your recording sessions.
Summing up
Following this guide on Things To Consider When Buying a Studio Monitor, you now have a better idea of what to look for before making your purchase. Remember to prioritize your needs and consider factors such as speaker size, frequency response, connectivity options, and room size to ensure that you choose the right studio monitor for your specific requirements. Taking the time to research and compare different models will ultimately help you find the perfect studio monitor that suits your budget and delivers the best sound quality for your audio projects.